
 The Gist
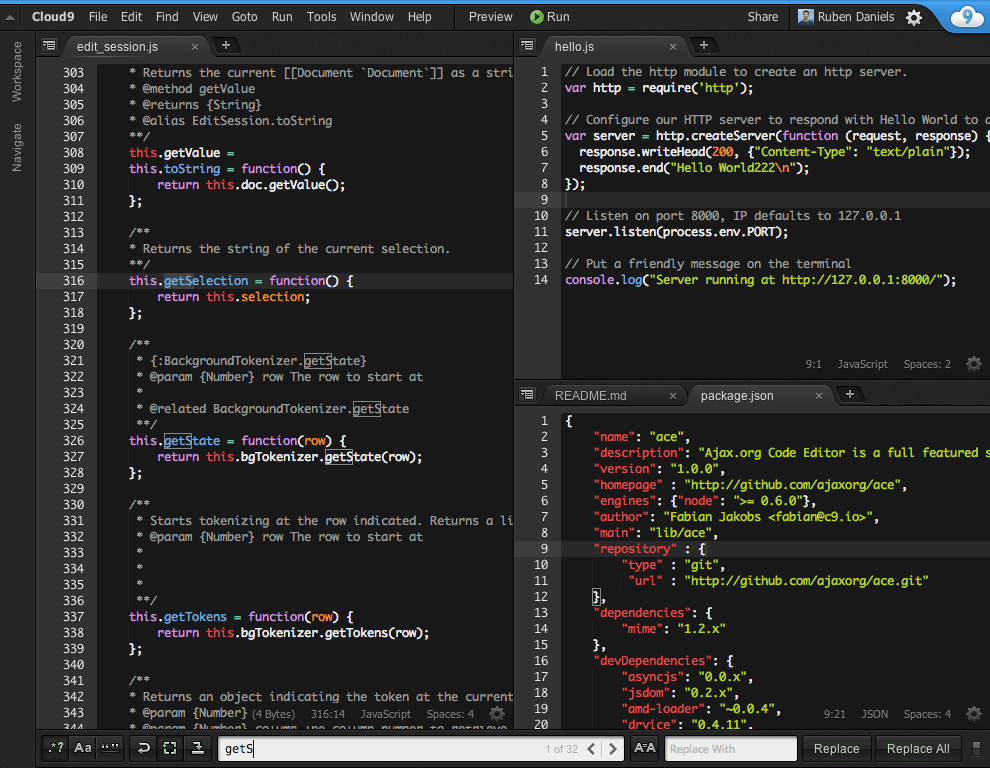
Cloud9 is a powerful web-based source code editing environment that has recently solved the major headache of editing files on a device located across a slow network connection. This post is not a description of how to use the features of Cloud9, but more simply a rationale for why I use it as well as how to install it and get it up and running.
If you want to skip past my pithy, verbose, and poor pontification and just learn how to install Cloud9 click here.
Big Fat Disclaimer
Choosing one’s code editor is a very personal decision. We developers get much too much enjoyment in the arguing of “my code editors better than yours.” Pick the one you like the best which helps you get things done. If you’re happy using Windows Notepad and it lets you accomplish what you need to then more power to you. Most development is about 20% clerical and 80% cognitive (I totally made up those numbers to make this article sound more intelligent).
The Pain
I have had worked in several circumstances where the build environment was complex enough that I couldn’t build it locally on my laptop. While located within the company’s speedy network (behind the firewall) I typically had no issues with file access. However, when I needed to access the company network via a slow VPN things got untenable. I’ve had other similar circumstances where remote editing was problematic. Do any of these sound familiar to you?
- The primary build environment is very elaborate mix of cross-compilers and requires access to many network located tools and resources.
- Tool licensing limits its location to a single build machine.
- Company security policy prohibits retaining source code on systems which leave the office.
- VPN access is available for personally-owned devices, but company policy prohibits keeping code on personally-owned devices.
- VPN access to network file shares is exceptionally slow and any delay in the edit, save, and recompile workflow hampers productivity.
- The build environment is Linux, but the company only issues Windows laptops.
In scenarios where I had a company laptop on which I could retain the source code, I’d tried all manner of techniques for editing. Here are some of the things I’ve tried.
- Used a local git repo on the laptop: I’d push changes to the company-network-located device over the VPN. The problem with this scenario is that it requires a commit-push on the laptop, then a pull or rebase on the company device. While this ensures changes are well preserved, it is a pain to when desiring a fast save-recompile cycle.
- Use Dropbox: Drop is exceptionally fast to sync files between two machines. However, it also replicates the files on Dropbox’s servers. This is a understandably unacceptable for many companies in terms of preserving IP on company-owned devices only. There are tools like Seafile which are Dropbox-like and allow keeping the files only on company-owned hardware. However the fastest syncing I’ve experienced with Seafile is 30 seconds over a VPN. This is not tenable for a fast workflow.
- Use a a Samba-share for direct edit and save: while this works when you only need to edit a single file, working on a whole source tree over a slow network share is painfully. Try grep-searching for matches over thousands of files on a VPN connected Samba share. If you have a good movie to watch while you wait (like “Ghandi”) then you’ll be fine.
What about vi or Emacs?
Any coder who slings “vi” or “Emacs” may attempt to slap me into submission with their very valid point that these editors have been allowing remote editing over nothing more than a terminal session for decades. For these tools slow bandwidth connections generally aren’t a problem. Furthermore these tools are infinitely extensible and fast.
To you, I reply, “Yes, but I want my GUI”. See, there are these things call Graphical User Interfaces. They make use of an interface called a mouse cursor, which allows for selection of text and novel things called “context menus”. And these tools have been generally available for about 25 years.
All snarky comments aside, vi and Emacs, when used by experienced users, are things to behold. And, with proper terminal configuration support mouse interaction. But, the learning curve for both those tools is very steep. When you decide to use those tools you must commit. I mean, you go all-in. You are in for a significant learning curve to wield them. Vi was originally created on terminals that didn’t have cursor keys. It is my opinion as a certifiable UI snob that vi and Emacs are not intuitive at all. They made lots of sense for terminals of the time. But for modern computers which have full interactive GUI’s at their disposal they tend to force a text-only/keyboard-only interface. For all you vi and Emacs masters, I solute you. Yes, be smug in your “skillz” for you can be proud. But, like using the Perl programming language, though I need to know enough to get by using it, I don’t have to like it.
I confess that if instead of spending as much time as I have spent on my quest to find the perfect web-based editor I were to instead used to learn vi or Emacs, then I likely wouldn’t be writing this article. But, you, the reader, can now benefit from my pain and not feel guilty in not mastering vi or Emacs to solve your remote editing requirements.
Setup and Install
These instructions assume a Linux or Mac host. I have not tested or installed Cloud9 on a Windows machine and am not sure how well it works. If using an Ubuntu-based Linux distro I found that I needed to install the “build-essentials” and “python2.7” like:
> sudo apt-get install build-essentials python2.7
Preparation
Setting up and installing Cloud9 requires a few considerations:
- By default it installs to the ~/.c9 directory. If your computer uses a shared network home directory with limited quota you might consider first creating a symlink for this directory to another less-limited local directory.
- Be sure you have a reasonably current version of Node.js for the install. Right now Cloud9 is using Node v4.4.6. The Cloud9 build will even install its own version of node (I show how to make use of it below). I highly recommend the use Node Version Manager to manage the versions of Node.js you use.
- You will need the “git” tool. For OS X the easiest avenue to attain it is to use brew. However, I chose to install Xcode. Though it is a large download, it’s handy to have.
Install
The primary installation instructions are here: https://github.com/c9/core. I’ve copied them here (it really is just three lines).
From the terminal run these commands:
git clone git://github.com/c9/core.git c9sdk
cd c9sdk
scripts/install-sdk.sh
The install may take several minutes as it must download several npm packages. There are further instructions on the website about how to pull down updates to Cloud9. This is a two step process which consists of going into your local git repo, doing a “git pull”, then re-running the install-sdk.sh script.
Launching It (There’s a bug!)
According to this link there’s a quirk with the installer that requires you to run this command after running the install (from the c9sdk working directory):
git checkout HEAD -- node_modules
I have found the best mechanism for running Cloud9 once it is installed is to use the version of node.js that is built/installed with Cloud9. Below is a handy script for running Cloud9. I typically navigate into the project directory I want to edit and then run it. Cloud 9 treats the directory in which it runs as the “project”. You can run it from your top-level home directory if you wish, but it will treat your entire series of directories as the project and include them in searches, which will slow it down and noise up your results. I find it better to limit it to the directory of the project I’m editing.
I will often run this script via “screen cloud9” so as to enable me to keep it running in the background when I close the terminal session. More info on the “screen” tool can be found here.
Helper Script
Copy the contents of this file into a file named “cloud9” and put it in a directory included in your path.
!/bin/sh
project=${1}
port=${2}

if [ -z "${project}" ]; then
 project=$(pwd)
fi

if [ -z "${port}" ]; then
 port=8181
fi

~/.c9/node/bin/node /path/to/git/repo/on/your/computer/c9sdk/server.js -l 0.0.0.0 -w ${project} -p ${port} -a nerdy:guy
Example of running the script
> cd ~/my/awesome/project/of/destiny
> cloud9
Yep, it’s that simple. The first time you access Cloud9 via the web it will kick of lots of compilations of Less CSS (you’ll see lots of these in the output.) They only happen the first time. A “.c9” directory will be created in the directory in which you run Cloud9. This is where it stores its state.
Things you need to change (and consider) in this script
- Remember to “chmod u+x” the script to be executable.
- Update the “/path/to/git/repo/on/your/computer/…” to be the path to the c9sdk directory you created above.
- Note you can specify a port on the command line. If you don’t it will default to 8181. This ability to specify a different port will allow you to run multiple instances of Cloud9 at once if you need to edit two different projects separately. The first time you run it on a Mac you will be prompted about allowing external connections (via OS X’s firewall).
- Set the username and password. The “-a” parameter allows setting a username and password if you want one. Omit this option if you don’t want to limit access. It is only simple protection (in the example I use “nerdy:guy”.) While this does not provide any type of encryption (you will need to do your own research on how to accomplish that) it does provide a small bit of protection to your code. Since my Cloud9 server is only accessible within my company’s well-protected VPN I felt safe with this minimal protection. Again, research how to use an HTTPS proxy (like apache or nginx) to provide HTTPS.
Accessing You Cloud9
Now, to access your Cloud9 session (if started at port 8181) simply open your web browser and type in the domain name of your machine (or IP address) along with the port. For example, if your device is at 192.168.1.101 then you’d enter
You’ll be prompted for your username and password. Enter and enjoy!
Troubleshooting
If you see lots of ENOENT errors you may have a permissions access issue. It could also be a node version issue. I found these issues went away when I used the script above to ensure I was using the right version of node.js.
Summary
I really like Cloud9. While it is not my main editor (I use Sublime Text) it could be. I’ve been impressed with the continued improvement that the development team has put into it. I like that they’ve kept it open source.
The Pros
- Last editing state is preserved when you close the browser. You can pick up from a computer right where you left off.
- Terminal sessions are preserved. The terminal emulator that is uses (tux) allows keeping your terminal sessions going even when you close the browser.
- Lazy search for files
- Multiple panes for viewing files
- Ability to browse the local file system. One of the options is to enable the viewing of the home path along with the project. The home path will be excluded from searches while still allowing you to browse it.
- Works well on low bandwidth connections
- You can actually drag and drop a local file into the window. Saving the local file is a bit tenuous, but it is useful for comparing local to remote files
- Debugging node.js type server-based apps is well done
The Cons
- Changing theme colors isn’t intuitive and requires trial-by-error to tweak the CSS
- Because it is in a web editor it suffers from the application-in-an-application discontinuity (web app within a browser). Full screen browser mode helps this discontinuity some. Likewise, the Cloud9 Chrome “app” can help.
- I haven’t found a Cscope-like plugin for navigating C/C++ code and symbols. I should write one…
- Support for C/C++ development isn’t as strong as the web development support.
